MacBook by Apple, has been ruling the gadget industry for a long time. However, as a Mac user, there are times when you must have felt the need to switch to windows.
Numerous windows-only apps and software do not run on Mac operating systems, leaving users with very few alternatives.
In this scenario, it is advisable to brush up your knowledge regarding some of the best windows 10 emulators available for Mac OS in the market.
What exactly is a Windows emulator?
Before we dive deeper into exploring the various types of emulators available for the users, it is essential to understand what emulators are and what their core job is. An emulator is a software that allows you to run software compatible with a different operating system on your system.
To explain it in layman terms, an emulator is a tool that lets you run any software which is not even compatible with your device.
Most Mac users make use of the emulator tool to get access to the applications and programs which are compatible with Windows only. However, the choice of emulator software can be quite tricky if you are new to Apple gadgets and software in general.
It is for this reason that we have curated a list of top emulators available in the market for the users. You can select the one that matches your preferences and use it to run your favorite Windows 10 Applications.
Best Emulators For Using Windows 10 on Mac OS
Well, if you are curious to know about the options available for you to run windows-only software on your Mac, take a look at the list of some of the best emulators available for your assistance.
1. Bootcamp
Bootcamp can be found in-built in all the Macs and is a reliable alternative if the user has an original version of the Windows, which has been downloaded from the Microsoft website. To access boot camp, follow these steps-
- Go to applications on your Mac
- Navigate to utility folder
- Finally, you will be able to see the Boot Camp Assistant App
The Application mainly creates a partition in your hard drive, which is used for installing and operating Windows on Mac.
Once you have installed Windows through Boot Camp, you will be asked to choose between the two operating systems every time you turn on your MacBook.
Before you begin installing Windows through the tool, you must check if your system is compatible with the Windows 10 software. Windows 10 is supported mainly by the following models of Mac-
- MacBook (after 2015)
- MacBook Air (2012 and later)
- Mac Mini (2012 and later)
- MacBook Pro (2012 and later)
- How to install Windows 10 with Boot Camp
The installation of Windows with Boot Camp is not complicated but can be tedious. Follow these steps to download Windows:
- Download the ISO file from the Microsoft website. For this, select the Windows 10 edition in your preferred language (English) and click confirm.
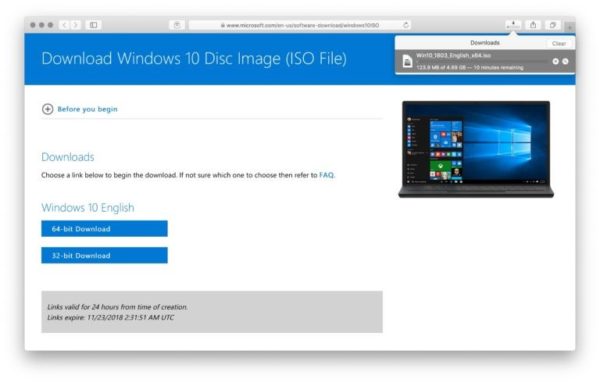
- Once the ISO file is saved on your system, open the Boot Camp Assistant. Click on continue so that the tool can automatically locate the Windows ISO file on the system.
- If you have used a flash drive or optical drive for the purpose of installation, you will be asked to create a manual partition where Windows will be installed. In other cases, the partition will be selected and created automatically.
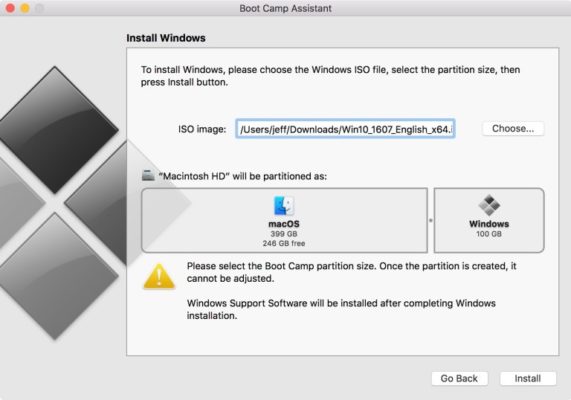
- Now, just follow the instructions that appear on the screen. You will be guided through a series of 12 steps, at the end of which Windows will boot for regular use.
- Lastly, when you are guided to Welcome to boot camp installer box, just click Next and accept the agreement. Click on Install, and finally, click Finish to reboot your system.
- Congratulations to you will have successfully installed Windows at the end of the process.
Benefits of using Boot Camp
- Using Boot Camp as your source of installing Windows has the following advantages-
- It is easy to understand the process. You do not need to download any third-party application.
- Both the operating systems can be run from the same system.
- The file integration between both the operating systems is quite smooth.
However, you might face a problem if the Windows version is not genuine or you do not have 8 GB of RAM and 55 GB disk space on your Mac. Moreover, the updates are not free of charge.
2. VirtualBox
VirtualBox is yet another emulator for running Windows 10 on Mac and is completely free of charge.
It is open-source programming and thus ensures that you are able to run Windows like any other application without having to change or modify the configuration of the system.
In order to start with the downloading procedure, you need to download the Windows ISO file from the Microsoft website and also download VirtualBox. Since VirtualBox comes with cross-compatibility, you do not have to worry about checking your system compatibility before using the software.
It can be downloaded from Oracle for free and can be installed like any ordinary app. You must remember that while downloading, you need to have at least 8 GB of free disk space in order to let the Windows install smoothly.
Once you have downloaded Windows file and VirtualBox, follow these steps to run Windows 10 on your system-
- Click on VirtualBox to open it and click on New to add a new virtual machine.
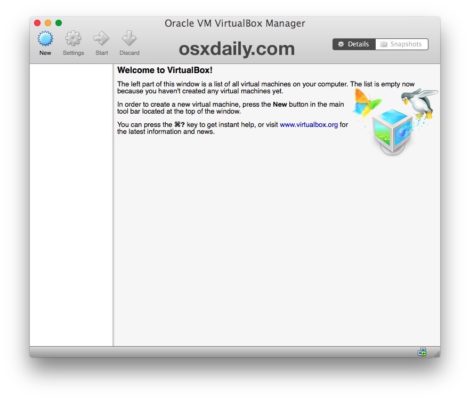
- Next, you need to name the virtual machine with something suitable and recognizable. Select ‘Microsoft Windows’ for type and choose ‘Windows 10’ as the version. Thereafter, click on Continue to proceed further.
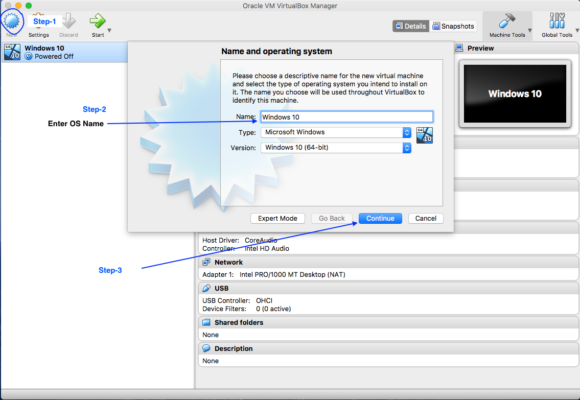
- Create a new virtual hard drive and click Continue again. At the primary VirtualBox window, click ‘Start’ to boot the newly installed software.
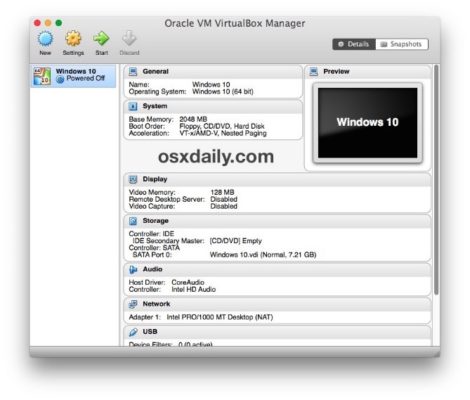
- Choose a virtual optical disk since there shall be no OS installed till then. Click the folder icon and select the Windows ISO file you had saved earlier. Now, click the Start button and you will be directed to the Windows 10 installer. Select your preferred language and click on ‘Next.’
- Fulfill the basic Windows 10 installation formalities by creating a user account, user name, and complete the basic Windows configuration.
- Once all the formalities are complete, you shall be able to run Windows 10 right in your VirtualBox, which shall contain a full-featured version.
The use of VirtualBox is advisable if you have the latest MacBook because it hampers the performance of the system.
The newer the system, the better it will be able to adapt to the changes without taking a toll on the performance.
However, if you want to run basic Windows apps on your MacMac, VirtualBox will certainly not disappoint you.
3. Parallels Desktop
Parallels Desktop is easily the most flexible and most efficient emulator available for downloading Windows in Mac. However, you can only use the software if you have Sierra or Mac OS X, for it is exclusively available for these versions of MacMac.
- Parallels Desktop allows you to run several operating systems in addition to Windows.
- It is for this reason that it is highly preferred by users who requires the support of multiple operating systems on a single gadget.
- The emulator package of Parallels Desktop comes with drive clean-up, video conversion, file archive, make GIF, video downloading tools, etc. which is rare for a similar package in the category.
The launching of Windows software is also as easy as launching Mac programs from the system and the user can also perform the drag and drop feature to shift files from the MacMac to the host platform.
You need to download Parallels Desktop first to get started with the installation procedure. Follow these steps to know in detail about the process-
- Download the Windows 10 through Parallels Desktop while you start with the software. For this, click on Parallels iconàNewàGet Windows 10 from Microsoftàdownload Windows 10.
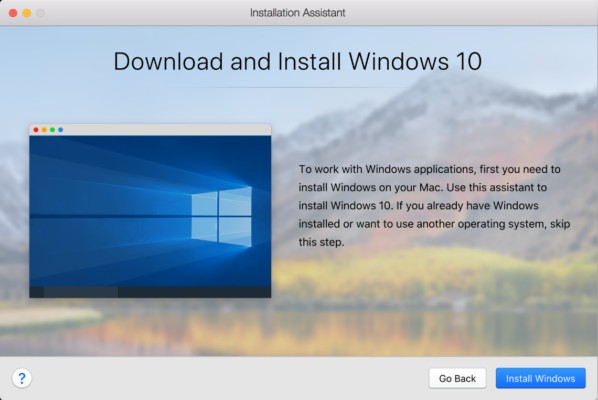
- In order to install Windows from the source, you need to create a virtual machine. Open the Parallels app from the Applications folder and go to the FileàNew option.
- Choose the ‘Install Windows or another OS from DVD or image file’ and click on the Continue button.
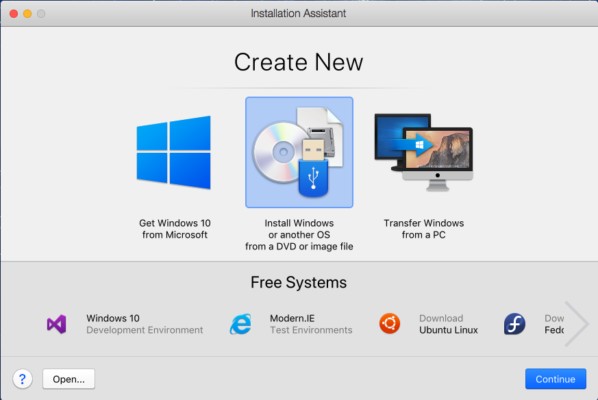
- Next, you need to select an installation media, which can be a DVD, .iso disc image, bootable USB drive, etc.
- Next, enter the Windows License Key and click Continue. If you do not have the key, click on Continue and then press Skip.
- Choose how you want to use Windows 10 in Parallels Desktop for Mac from options like productivity, software development, games, etc. choose the option which matches your requirement and press Continue.
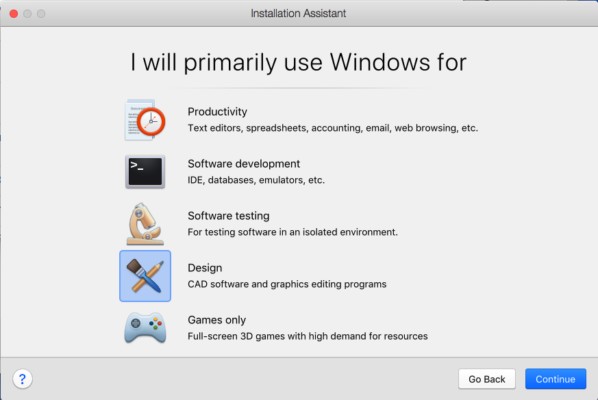
- Create a name for your virtual machine and specify the location if you want—Press Continue, which shall start the installation process.
- Once the Windows are installed, you can launch it by either opening a Windows application or clicking the Power button.
Parallels would be a suitable tool for running gaming software, which is compatible with Windows only.
Moreover, the most exciting feature of parallel is that the package is fully capable of running Windows applications from Mac Dock and switch between both the operating systems.
- Ps3 Emulators Download For PC
- Best PS4 Emulator For PC
- Play iOS Games on Windows 10
- Fix Gameloop 98 Loading
4. WineBottler
WineBottler is an open-source program that can be used to run Windows 10 on Mac. The program simply wraps the Windows application in something which can be easily run on OS X.
If you are looking for software that lets you run one application of Windows on Mac, WineBottler is the right choice, for it does not meddle with the configuration of the system.
- Once you have installed WineBottler on your system, you will be asked to pick a program from a list of programs inside the app.
- Once you pick the program, the software will download, install, and arrange the program for the user.
- In case the program you want is not available on the list, do not panic. Simply look for the ‘.exe’ file and download it.
- Now, right-click to open the file and choose the option ‘Open With > Wine’ and run the Application on the system.
In order to get started with WineBottler, find a version that is compatible with your Mac OS X. next, follow these steps to run Windows applications smoothly-
- Open the DMG file that you have downloaded.
- Now, copy and paste the Wine and WineBottler applications to the application folder for installation. Once they are installed, you can easily launch WineBottler from the same application folder.
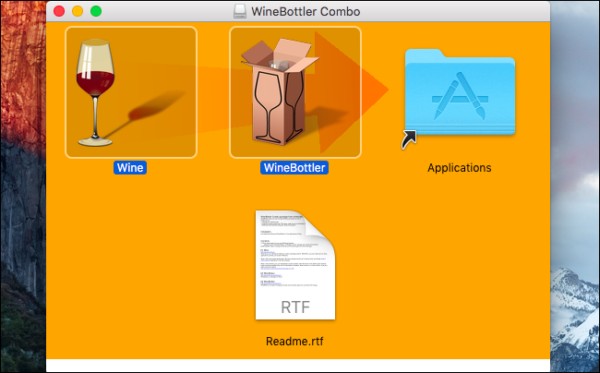
- WineBottler will present you with a list of programs that you can download. Choose the Application to see it getting downloaded, installed, and configured on your system.
- The installed Application is saved under the title ‘On My Mac’ in the WineBottler window. The user can also uninstall the Application from here.
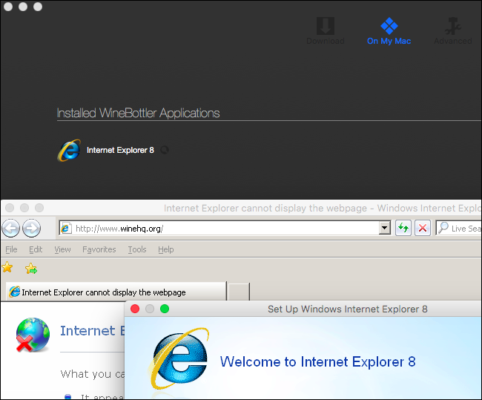
You must keep this in mind that WineBottler does not have all the applications in its list, and therefore, there are chances that you may not be able to download some of the applications through the package.
Moreover, installing too many applications might cause the software to crash often, and therefore, you must select WineBottler as the emulator if the number of applications that you need to run is less.
5. CrossOver Mac
CrossOver Mac is one of the most convenient and reliable emulators which allows you to run any and every Windows program without the need for a virtual machine.
- The users of CrossOver Mac can run thousands of programs that are perfectly compatible with the software.
- What makes the emulator system resource-efficient is the fact that it does not require a virtual machine. With the help of the installer, one can search and install Windows programs without batting an eyelid and launch them simultaneously.
- The software is able to integrate with Mac OS in a smooth manner which means that opening any Windows program from the Dock is as easy as opening the native apps.
- It is a software which is designed exclusively to run the Windows related programs and applications.
If you are planning to install Windows 10 apps on your Mac via CrossOver Mac, follow these steps to get detailed information about the steps to be taken-
- Download CrossOver on MAC, by navigating to CodeWeavers.
- The software will be downloaded in the form of a Zip file, which can be located by going to the Downloads folder. Double click on the file to open it.
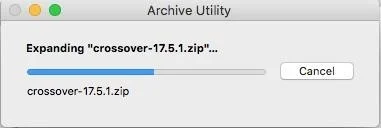
- Move the CrossOver.app in your download folder by double-clicking on the icon. When the software starts for the first time, it will ask you about how you want to run it. Choose the trial mode, which is also the default option.
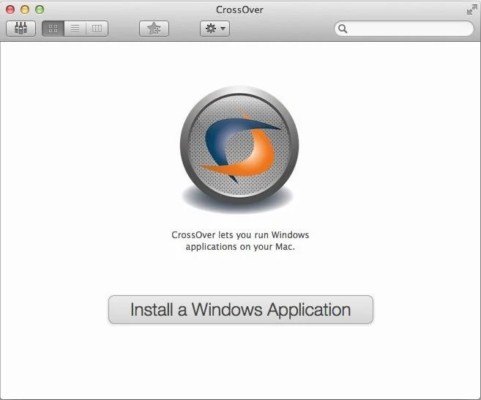
- Next, click the Install a Windows Application button from the screen that appears and type the name of the Application which you wish to search.
- The crossOver will go through its database to display a list of matches that are relevant to the search results.
- Click on the Application which you want to run. The software will display its compatibility information from the database, and once you are sure of the Application, click on the Continue button.
- Next, select an installer source and click the Choose Installer file, which shall open a Finder window, allowing you to navigate to the location of the installed file.
- Select the app and click on the use of this installer button, which shall return you to the Select an Installer source screen. Click on the Continue button next.
- Select a bottle, which is a storage space created by CrossOver to place your Application. After selecting, click on the continue button, which will direct you to the Ready to Install screen.
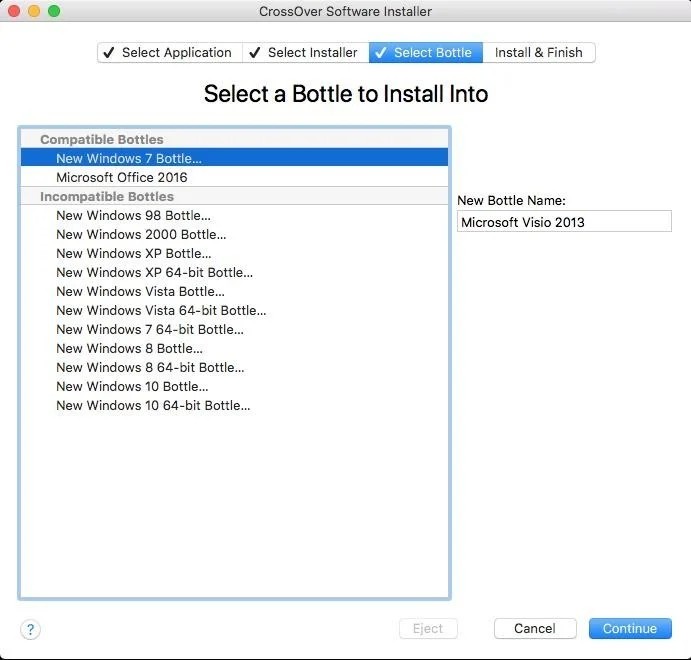
- Click on the Install button there, and once the process is incomplete, you can run the software easily.
- Once the process is over, click Done. Find the bottle you created for your Application and run the Application or program with the help of it.
Alternatives For Running Windows Apps on Mac
If you are in a dilemma and finding it hard to choose between Mac and Windows, we have got you covered. Why even choose when you can easily get the best of both.
Dual booting allows you to shuffle from one operating system to another on the same system without the slightest of the hassle.
When it comes to installing Windows OS on Mac, there are two major options available for the user,
- The user can either make use of Mac Boot Camp, which is a native feature of the operating system of MacMac, and allows the user to install and run Windows 10 OS on a MacBook.
- The other alternative available is that of a virtualization machine, which is a third party program. It is built in order to allow the installation of a separate operating system on the same machine.
- In addition to this, there are various packages that allow you to run different Windows-related applications and software without disturbing the configuration of the system OS.
Requirements to use Windows 10 OS on Mac Devices
if you are going to download a PC emulator for your Mac, you may want to remember a few details which go hand in hand with most of the emulators available online.
- Before downloading Windows on your Mac, you might want to check for outdated apps on your MacMac as they are likely to create conflicts.
- Clean any junk or outdated apps to ease the functioning of your operating system while it gears up for Windows download.
- Always check the compatibility of the emulator with your MacBook in order to avoid any hassles post the downloading process.
- Leave at least 50 GB of free disk space and 8 GB of RAM so that the Windows 10 software can be downloaded easily.
Conclusion
This is all you need to know about Windows emulators for MAC OS. Try everything and let us know what you think is best.
