The Bluestacks Windows 10 PC App was designed to enable Android applications to run on Personal Computers (PCs) running on either Apple’s macOS or Microsoft Windows.
The BlueStacks Android emulator is known to have a very high performance. One of the extraordinary features of the BlueStacks Android Emulator is the capacity to synchronize a personal computer with a mobile device. This way, you get to be able to download, install, and run your favorite Android apps on your PC.
Bluestacks supports a wide range of Android Apps such as education, technology, entertainment, Games, and all other kinds of Apps. BlueStacks has built-in some famous Android Apps like WhatsApp, Instagram & Snapchat, which can be opened directly from the Apps section in the emulator.
The Apps section is the segment on the emulator where you would locate installed Apps on your Windows 10. BlueStacks enables you to launch and use these apps using your mouse and keyboard.
For PCs that have the touch-enabled feature, apps can be accessed from BlueStacks through touch. BlueStacks supports all your input devices. It is very user-friendly and straightforward to use. You need absolutely no guide to use a BlueStacks Emulator.
How to Download BlueStacks on Windows 10 PC?
- Over the years, BlueStacks has released several versions of the BlueStacks Android emulator. But, none can compare to the “BlueStacks 4”, the latest update released on September 15, 2018.
- BlueStacks 4 has certain features that make it superior to previous versions;
- -it runs on the Android OS Nougat
- -it features better graphics than seen in the earlier versions
- -It is six times (6x) faster than Samsung S9+, so the old complaint of how slowly BlueStacks used to run is now reduced. This would also mean that it offers 6X faster gaming performance compared to any android mobile on the planet. The procedure to download bluestacks for Windows 7 PC or Windows 8 or Windows PCs is all the same.
To Install the BlueStacks 4 on your Windows quickly and without errors, you can follow the following steps below;
1. Downloading BlueStacks for Windows 10 using the official EXE file.
- Open your preferred browser.
- Visit https://www.bluestacks.com/download.html to get Bluestacks for Windows 10.

Source: https://cdn-www.bluestacks.com/bs-images/BS6.png
- Click on the big green “Download” button.
- Once the download is complete, you are all set for installing the Bluestacks App Player on Windows 10 PC.
- Open the downloaded file to begin the installation.
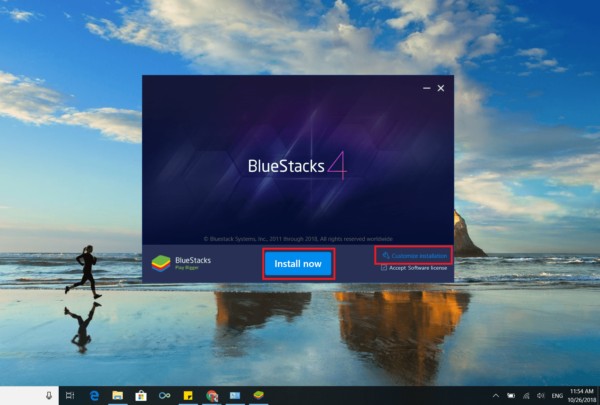
2. Installing BlueStacks on Windows 10 Laptops.
– Click on the “Install Now” button to start installing the BlueStacks 4 emulator. This might take some minutes, depending on the specifications of your PC.
Source: https://cdn-www.bluestacks.com/bs-images/BS7.png
–NOTE: at the start of the installation process, you can pick your preferred location for the Install by clicking on the “Customize Installation” option on the installation page, as seen in the snapshot above.
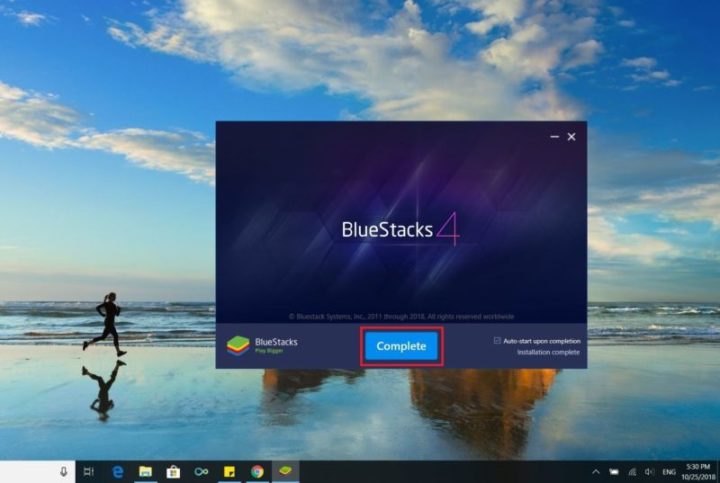
– Click on the “Complete” button to complete the process of installation.
Source: https://cdn-www.bluestacks.com/bs-images/BS31.jpg
-You have successfully installed your first BlueStacks 4 emulator!
-You now have to start the App and complete the One-time Initial Setup process.
3. Setup and Downloading your First App
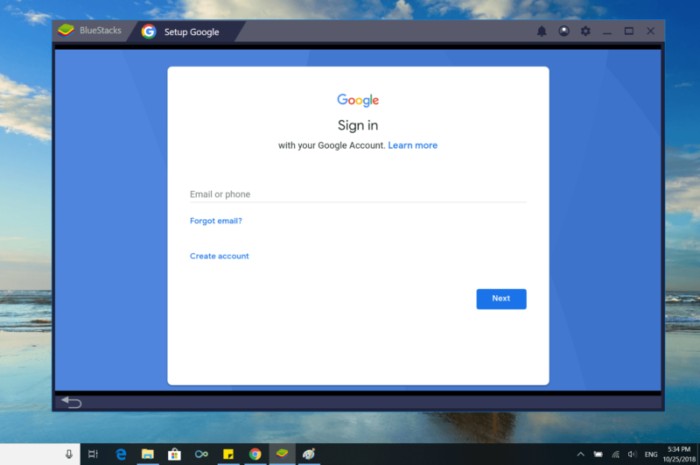
-The first page should be the Welcome screen, Pick a Language, and continue.
-You would be asked to Sign in to your existing Google account or to create a new one to get started.
Source: https://cdn-www.bluestacks.com/bs-images/BS4.png
-That is just about it.
-Now, you would notice a Search Bar on the right part of the interface.
-Search for App you want to use.
-Install it and start using it!

Source: https://cdn-www.bluestacks.com/bs-images/BS5.png
One more exciting thing about BlueStacks is that you can get to run multiple BlueStacks accounts and play all your favorite games or make use of your favorite apps, all at the same time. Read the “BlueStacks Multi-instance guide” at https://www.bluestacks.com/blog/bluestacks-exclusives/new-bluestacks-multi-instance-en.html to find out more details about this feature.
The BlueStacks App Player is a cloud-based, cross-platform application designed by an American technology company called BlueStacks. The CEO of BlueStacks is Rosen Sharma, one of the three co-founders of this software, the others being Suman Sara and Jay Vaishnav. The headquarters of BlueStacks is located in California, United States of America.
In 2011, BlueStacks was first revealed at a conference in San Francisco, the USA, on May 25. Some months after the alpha version was released to the public. Originally, BlueStacks was designed just for the Microsoft Windows platform, but close to 10 months later, a public beta for Mac Os was released. The BlueStacks emulator had a lot of bugs in both Windows OS and Mac OS, but over time the developers have done a very fantastic at developing and upgrading the App to give users a better product.
Enjoy!
NOTE: You need a good internet connection to download BlueStacks 4 and even to download the game or app that you need.