MEmu stuck at 99% or after loading 59%; you don’t know what to do? Let me tell you, this is a common issue and there are some quick fixes for that. So, if you are facing this problem and you don’t know what to do, don’t sweat, don’t panic. Read this article, and you will be able to Fix the Memu Installation Stuck at 59 or 99% error on Windows 10.
Without further ado, let us begin!
Recheck the System Requirements
One of the primary problems is that of insufficient system resources. MEmu can be installed on computers with various system specifications. The installation will not be a problem even if you have low system resources. The problem comes when you try to use the application.
So, be wise, and before you take any significant step, check the system requirements for using MEmu.
MEmu Android Emulator Basic Requirements
The necessary system resources that you must have for running the MEmu emulator are:
- A CPU from AMD or Intel with X86 or X86_64 architecture.
- Operating System – Windows XP SP3, or Windows 7, or Windows 8/8.1, or Windows 10.
- DirectX 11 or Graphics Card that supports OpenGL 2.0.
- Your BIOS should support Hardware Virtualization Technology, and it should be enabled. In the case of Intel users, the technology goes by the name Intel VT-x. In the case of AMD uses, the technology goes by the name AMD-V.
- Your computer should have at least 2 GB of free space in HDD, or SSD, or a hybrid drive.
- In the case of RAM, your Windows PC should have at least 2 gigs of memory available.
MEmu Emulator Recommended Requirements
Though the basic requirements are quite minimal, the developers suggest that you use the following:
- CPU – Core i5-8400 or higher (or AMD equivalent).
- RAM – 16 GB.
- Operating System – Windows 10.
- Graphics – Nvidia GeForce GTX 1050.
In case your computer fulfills only the basic requirements, MEmu will not perform optimally and you can see that the Memu Android emulator is stuck at 99% of 59% from time to time. The best option here is to improve your laptop or desktop specifications.
Update Your Graphics Driver

This is the next most logical thing that you should do. An outdated graphics driver can lead to this very annoying problem. There is nothing to explain. Simply visit the vendor site of your graphics card and download the latest driver offered it. Install it and then run the MEmu emulator.
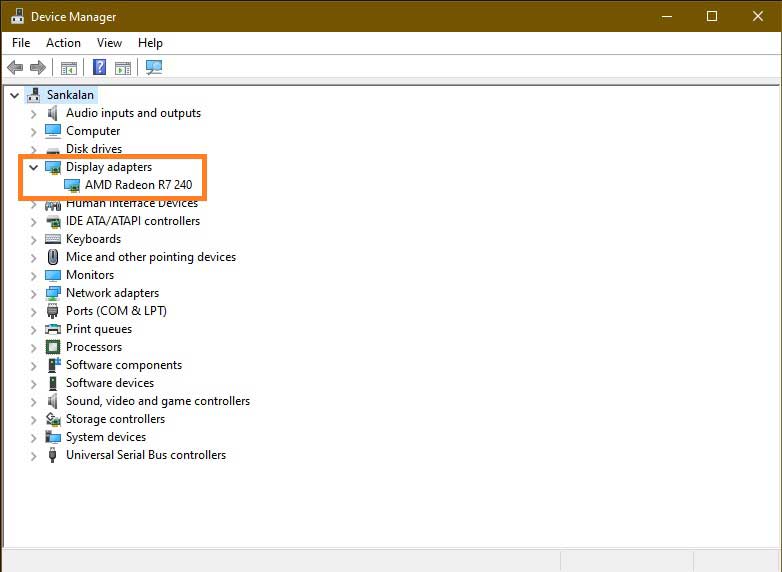
In case you are not sure which graphics card you have; you can check that using the steps below:
- Click on the search bar or the search icon your desktop taskbar and type in ‘Device Manager.’
- Click on the ‘Display Adapter’ option and it will show you the graphics card detail.
- Visit the vendor site and search for the latest driver for that card and download it.
Please remember that even though Windows 10 offers divers via periodic updates, the driver you get may not be the latest one. So, it is always better to go ahead and get the newest driver directly from the vendor.
Close Other Apps Running on MEmu
It is not uncommon for people to run multiple apps on the MEmu emulator (or any emulator as such). When you run too many apps running on your MEmu emulator along with other Windows applications, you can face the problem.
Do the following to see if the problem is resolved:
- Close all running programs on Windows 10 except MEmu.
- In case you have too many apps running on the MEmu emulator, close other apps that are not in use.
The problem may be caused by low system resources. Releasing system resources by closing unused programs and apps can release the vital resources for the MEmu emulator and help you to overcome the problem of MEmu stuck at 99% & 59%.
Juggle Between OpenGL and DirectX

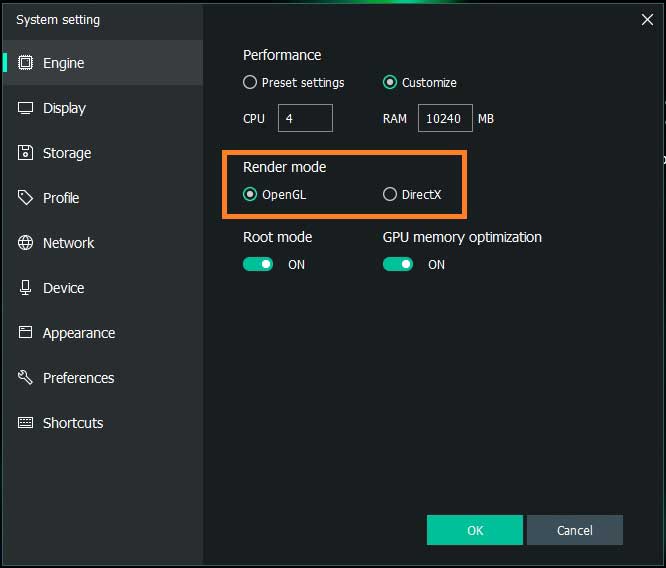
The problem may be caused by the rendering mode that you have selected. If your MEmu emulator is already running, do the following:
- Open Multi-MEmu to see the list of all individual emulators that are running. Locate the one that is stuck at 99% or 59%.
- Click on that individual emulator’s settings option to open the settings panel.
- In the Engine tab of the settings panel, switch between Rendering Mode options that you have. If you have OpenGL selected, change it to DirectX and vice versa.
- Once you have made the switch, save the settings and close the window.
- Fix Gameloop Stuck error.
If the rendering mode was causing the problem, this move should solve your problem.
Enable Virtualization in BIOS
MEmu stuck at 99% and 59% is often the result of virtualization not being enabled in the BIOS. Remember, virtualization is a required parameter for successfully running and using MEmu. In order to enable virtualization in BIOS, follow the steps below.
Enabling Virtualization for Intel Users
- Restart your PC and on the screen where you see the manufacturer logo, press the designated button to enter the BIOS setup. It can be F12, F8, F2, Esc, Del, etc. depending on the BIOS manufacturer.
- Once you are in the BIOS setup window, use the keyboard’s right arrow key to navigate to the ‘Security’ tab.
- Use the down arrow key to select the option which reads ‘Virtualization’ and hit the enter key. A context menu will open.
- In the context menu, use the up-down arrow key to select ‘Enabled’ and hit the enter key.
- Press the F10 button to save the settings and exit BIOS.
Your system should now boot up to the desktop with virtualization enabled.
Enabling Virtualization for AMD Users
- Restart your PC and enter BIOS but pressing the designated key when you see the manufacturer logo on the screen.
- Once inside the BIOS, maneuver to the ‘Advanced’ tab using the arrow keys.
- Under the ‘Advanced’ tab, maneuver your way to the option which reads ‘Secure Virtual Machine Mode’ and hit enter to open the context menu.
- In the context menu, use the arrow keys to select ‘Enabled’ and hit the enter key.
- Press F10 to save the settings and exit the BIOS.
Once you have enabled virtualization, go back to MEmu and see if the problem still persists. If it is still there or if virtualization was already enabled, move on to the next method.
Create a New Emulator

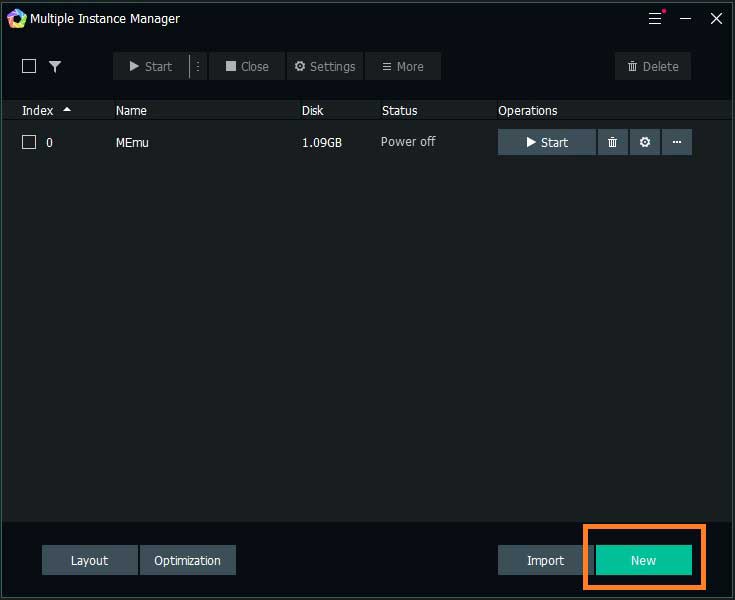
If your MEmu is stuck at 99% & 59% and you are unable to figure out the reason, simply create a new emulator using Multi-MEmu. Proceed as per the steps mentioned below:
- Open the MEmu Multiple Instance Manager.
- On the Multi-MEmu window, click on the New button at the bottom of the window.
- Wait until a new emulator is created.
- Start the new emulator and start the application that you want to use.
Ideally, this should be able to resolve your problem. Unfortunately, if it doesn’t help, move on to the next method.
Temporarily Turn off Antivirus
Like it or not, sometimes, your antivirus program can be the real culprit. There are some antivirus programs that use hardware virtualization and hence, lead to conflict with MEmu. There are some other which are too strict with their firewall settings, thereby causing the annoying problem.
Kaspersky, Avast, and AVG are the top antivirus programs that are known for conflicts with MEmu. Disable the antivirus program that you are using for some time and see whether MEmu is functioning correctly. If yes, you may have to keep your antivirus program disabled while using MEmu. In order to disable your antivirus program, use the steps below:
- From your desktop taskbar, right-click on the system tray icon of your antivirus program.
- If you see the option of disabling the program, use it. If you have don’t have the choice, but you see the exit option, use it to disable your antivirus program altogether.
Now check back to see whether MEmu is showing the same problem or not. If the issue disappears, use MEmu by disabling your antivirus program. If the problem stays, move on to the next method.
BUT…
Remember to turn on your antivirus program again to ensure that you keep getting the protection against threats from harmful programs like Malware, Spyware, etc.
Reinstall MEmu
This might not be an easy decision but, if none of the methods mentioned above worked for you, it might very well be the case of corrupted MEmu files.
Such corruption can happen for many reasons like:
- There was a power cut while installing MEmu.
- There was a new Windows update that caused a possible conflict and corrupted MEmu files.
- Maybe, a virus or malware program caused the issue.
- Maybe a third-party application that you installed after MEmu is causing the problem.
Whatever the case be, corrupted MEmu files can leave MEmu stuck at 99% and 59%. To rule out the possibility, uninstall MEmu completely. Leave no traces back. You may use a third-party program to do so, or you can do that on your own. I will always recommend not using any third program.
Some antivirus programs come with integrated app remover tools. If your antivirus program has that tool, you can always use it.
Once you have entirely removed MEmu, download a new installer file form the developer site and install it.
Reset Windows

I will be honest. This is not something I like to do. So, I will suggest that you keep this method as the last resort only if reinstalling MEmu has failed to get rid of the problem of MEmu stuck at 99% and 59%.
This is the last resort, and I call it a desperate measure for a desperate time!
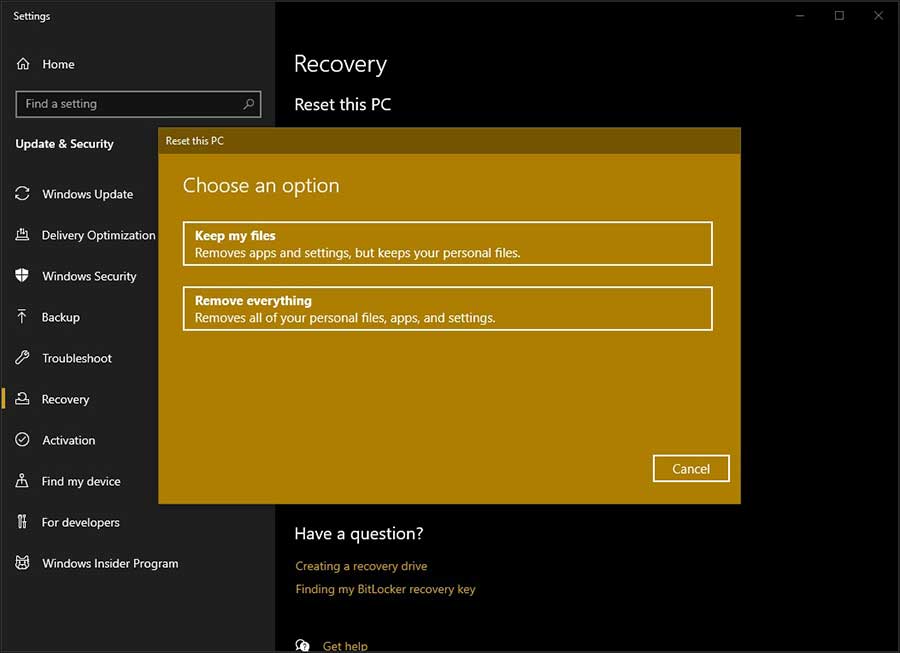
Make sure that you remove your personal files (documents, videos, photos, software installer files, etc.) in an external drive before you reset your PC. Though you will have the option of retaining your data during reset, I will suggest a complete wipeout of everything. So, take backup.
Once you have the backup, follow the steps below:
- Click on the search icon or the search bar in the taskbar of your Windows PC and type in Reset this PC and hit enter.
- In the Recovery settings window under the ‘Reset this PC option,’ click on the Get Started button.
- On the popup, click on ‘Remove Everything’ and proceed as per the onscreen instructions.
This move will completely reset your Windows 10 PC and remove everything that you ever installed and a fresh copy of Windows 10 will be installed automatically.
Now, go ahead and restore all files from your external hard drive and install a fresh copy of MEmu. This will get rid of the problem of MEmu stuck at 99% and 59%.
Do let me know which one worked for you. If you figured out some other solution to the problem, do not forget to share the same with others.